I recently posted about classes you could use in TTG text blocks to place and style images. Two of those classes are “border” and “shadow.”
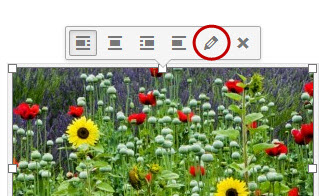 This post is about adding borders and shadows to images in WordPress. And it’s really as simple as adding one or two words to the Image Details dialog box. In the WordPress post editor, once you’ve added an image to your blog post, click on on it. You’ll see a small box with some icons pop up. Click on the pencil icon.
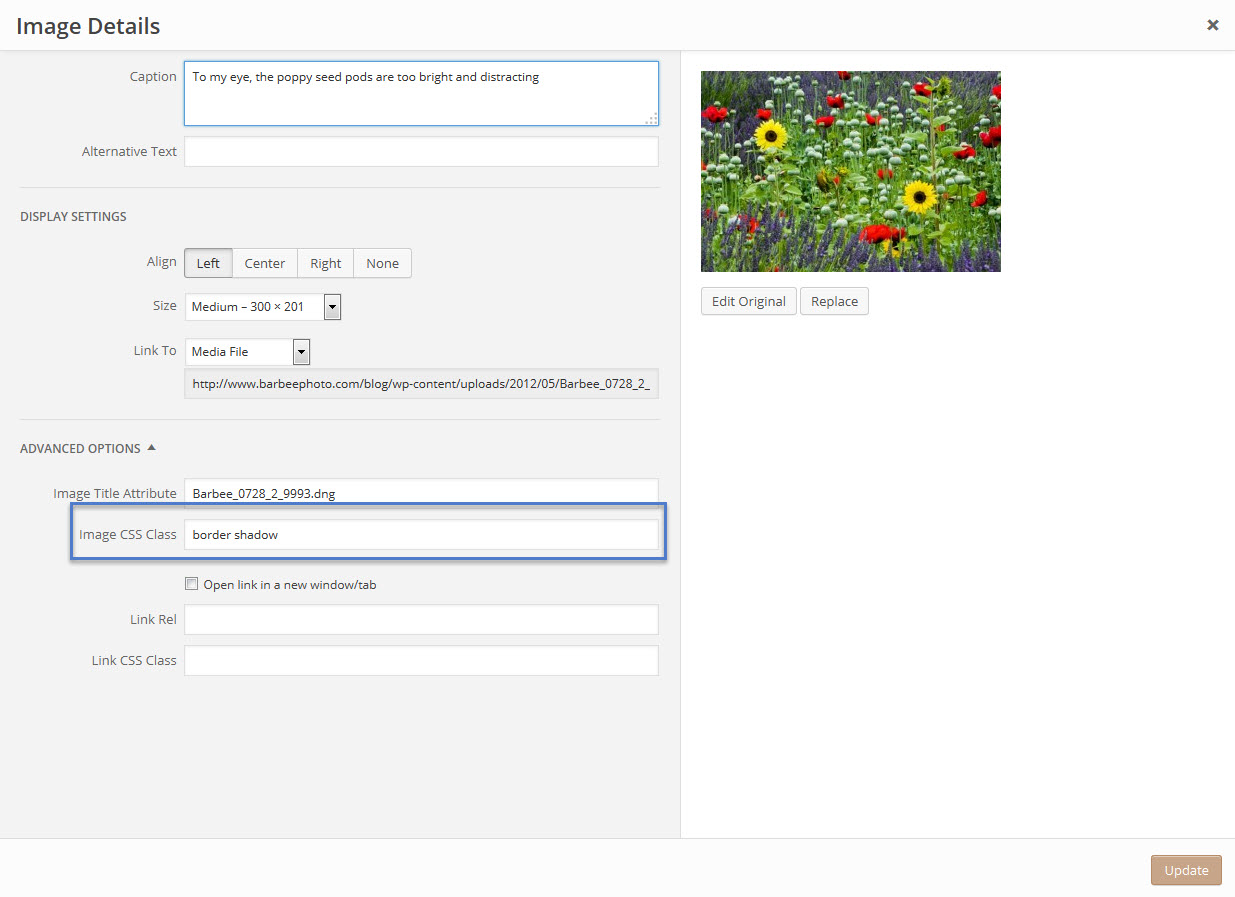
This will take you to the Image Details page for that image. If the Advanced Options aren’t already showing, click on the down arrow next to Advanced Options. One of the advanced options is “Image CSS Class”. And here is where you can apply the border and shadow classes, or any other classes for that matter. Just type them in, using a space to separate classes.
And that’s it. Update the image, update the post, and take a look at the post preview or, if you’ve already published the post, the actual post. Be sure to refresh your browser. The image above has both the border and shadow classes applied.
But there’s one little snag you might run into. And that’s if you’ve added a caption to the image. When that happens, the class .wp-caption gets added to the div that contains the image tag. And the class .wp-caption just happens to have a rule that essentially eliminates the border around the image. And because of a thing in css called “specificity”, the .wp-caption styling overrides the styling for the image element by itself. You see, the more specific the css selector, the higher priority it takes. CSS classes are more specific than html elements (the IMG tag in this case) so the class takes priority.
But there’s a fix. There always seems to be a fix. In this case, the fix is to write a css rule that’s even more specific than the one being applied:
.wp-caption img.border {

border:1px solid black;

}
What this does is to apply a border to an image element that is inside of something (a div in this case) that has the wp-caption class applied. Now that’s pretty specific and it overrides the straight .wp-caption rule and restores the border to the images.
Just add that code to your custom css file.

