Except for those in TTG CE4 Pages, there are no text alignment controls for the Page Copy (md) fields. In Pages you can set alignment to left, right, justify, and center. But for Gallery, Stage, Autoindex, and CRG, there are no such controls to align text on TTG pages. Alignment is always set to left aligned. This means that if you want to, for example, center align text, you’ll have to know a little bit about html and styling to align text in these plug-ins. It’s not hard to do.
You have three choices to approach this:
Use inline styling, where you write the html and apply the text-align style to each element as you go.
Use custom css, where you create the styling as classes in a custom css file and apply those classes where and when needed.
Change the css for the entire site so that all text will align either center or right or justified.
With the first two choices you’ll be writing your text in html.
The approach you take can be dictated by how often you might need to use center, right, or justified alignment. If you rarely need to use different alignment, then the inline approach is the quickest. But if you think you might want to apply different alignment more often, then creating a custom class and applying it as needed would be the easiest. And if you know you always want everything aligned center, right, or justified, you can write css that will do this without you needing to apply it in the text blocks.
The css property we’ll use is text-align. The values we’ll use are left, right, center, and justify.
Align the text only sometimes. Actually hardly ever at all.
Let’s start with the first option. Let’s say you have one page where you want to center align all your text, including any headings. We’ll need to apply the styles in-line. Instead of using Markdown in the Page Copy (md) field you’ll need to use html.
We’ll begin with the page heading, using an H2 heading.
A normal heading will look like this:
<h2>This is a page heading</h2>
And this is the same heading with styling to center the text:
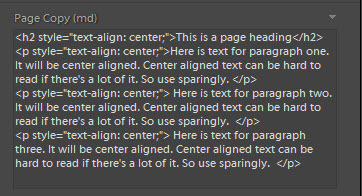
<h2 style="text-align: center;">This is a page heading</h2>
Simple enough.
For the text, we’ll wrap each paragraph in a <p> tag and apply the same styling.
<p style="text-align: center;">Here is text for paragraph one. It will be center aligned. Center aligned text can be hard to read if there's a lot of it. So use sparingly. </p>

<p style="text-align: center;"> Here is text for paragraph two. It will be center aligned. Center aligned text can be hard to read if there's a lot of it. So use sparingly.  </p>

<p style="text-align: center;"> Here is text for paragraph three. It will be center aligned. Center aligned text can be hard to read if there's a lot of it. So use sparingly.  </p>
And that’s all there is to it. If you want to apply other styling, you can do so. In fact, if you want to change the color or styling of just one word you can do that too. See this post.
(HINT: it’s much easier to write your code in a plain text editor and then copy/paste it into the Lightroom Page Copy (md) fields.)
Align text some of the time
Here we’ll be using custom css to align text on TTG pages. If you haven’t done it already, you’ll need to enable phplugins site-wide and then enable custom css.
The second method, using custom css classes, is a bit more elegant but it takes a little more set up. And even here you have some choices. Do you want all text on the page to be, say, center aligned? Or maybe you just want to be able to center only the heading. Personally, I think it’s easier to use inline styling if you only want to center align the heading. It takes about as much typing to apply inline styling as it does to apply a class.
So I’ll address the situation where you want to apply styling to all the text on the page. Let’s take the same example as above. Remember, to do this you have to write all your text in html:
<h2>This is a page heading</h2>

<p>Here is text for paragraph one. It will be center aligned. Center aligned text can be hard to read if there's a lot of it. So use sparingly. </p>

<p> Here is text for paragraph two. It will be center aligned. Center aligned text can be hard to read if there's a lot of it. So use sparingly. </p>

<p>Here is text for paragraph three. It will be center aligned. Center aligned text can be hard to read if there's a lot of it. So use sparingly. </p>
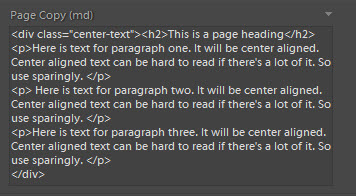
To apply the custom class we’re going to create, wrap all that text inside a <div> tag and apply the custom class to the entire div. Here I’ve named the class “center-text“.
<div class="center-text">

<h2>This is a page heading</h2>

<p>Here is text for paragraph one. It will be center aligned. Center aligned text can be hard to read if there's a lot of it. So use sparingly. </p>

<p> Here is text for paragraph two. It will be center aligned. Center aligned text can be hard to read if there's a lot of it. So use sparingly. </p>

<p>Here is text for paragraph three. It will be center aligned. Center aligned text can be hard to read if there's a lot of it. So use sparingly. </p>

</div>
Now, in your custom css file, create the class that will contain rules to center the text. All classes start with a period and in this case I’ll follow the class name with an html element. This basically says “apply the styling to the element inside of this class.”
So the selector .center-text h2 takes all h2 tags inside the class “center-text” and applies the styling. Here’s how we’ll center align the h2 headings and paragraphs.
.center-text h2, .center-text p {

text-align: center;

}
And if you want the alignment to apply to other headings you might want to use, just add those selectors: .center-text h3, etc. Just add them to the other selectors and separate each selector with a comma.
Align all the text all the time
Our third and final scenario is when you want all text in all page content areas to be aligned other than left. This way, you don’t have to write any html in the Page Copy (md) fields, just write with Markdown as normal. Since all text blocks are in The Block of a TTG page (inside of a div with a class of “the-block”) we can use that to target the elements that are only inside text blocks as opposed to all text areas like navigation or the footer.
Since I often use H2 as the page heading and H3 as a sub-heading, I’ll add H3 to the list:
(Update for Backlight: .the-block is not a valid class in Backlight. Instead, use .the__copy)
.the-block h2, .the-block h3, .the-block p {

text-align: center;

}
But let’s say you want to center headings but justify the paragraph text. This is a fairly common thing to want to do:
.the-block h2, .the-block h3 {

text-align: center;

}

.the-block p {

text-align: justify;

}
With just a little bit more css knowledge under your belt, you can start customizing things even further. And if you really want to take control over your text, look into using the Responsive Grid Framework that is included with TTG.

