Note: this post was originally written for TTG CE3 plugins. CE4 plugins have some updated classes for floating elements. See this post for the new classes.
See this post for adding inline images in Backlight.
In all TTG Pages, Autoindex, Gallery, CRG, and Stage text blocks, as well as Publisher Page Copy areas, you can add images in the block directly from within the plug-in. Just look at the bottom of the Content Area in the Color Palette (in Pages, you need to look at the bottom of each individual page’s Content Area). Look for Image Position. The options given are No Image, Center, Left, and Right.
These are perfectly usable and if you want an image centered above the content, use this option.
If you use either the Left or Right options, the image will be place to the left or the right.
You’ll also see options for Image ID and Width. The Image Width setting sets the image width in columns. The page is set up in a 12 column grid so if you choose 4 columns as the width, the image will take up 1/3 of the width of the page. What’s important to know here is that the text will then take up 2/3 of the page. So what you’ll see is the image on one side of the page and all of the text on the other side. In other words, the text will not wrap around the image.
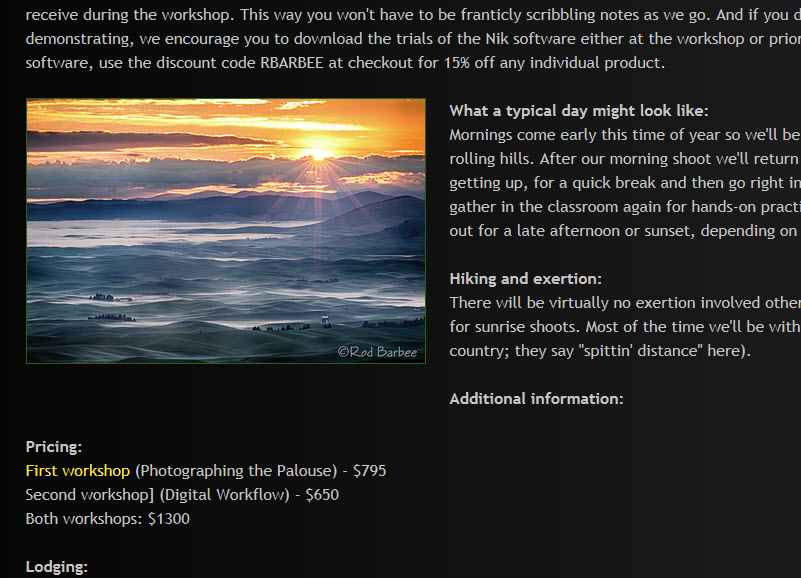
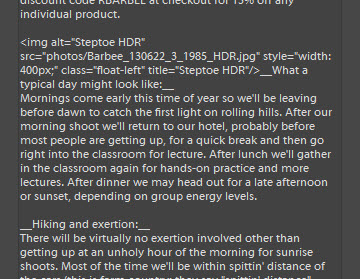
But if you want text to wrap around images in the block you need to use a little html and include the image within the block text itself. I do this all the time, especially in my workshop pages. If you know some html, this is easy. If you don’t, you probably feel like you’ve just sat down for an advance integral calculus test when you thought your were sitting down for a nice cup of coffee.
If you have TTG Pages, Matt’s included some example code on the Info page (pre-CE4) of the default Pages setup. But since you’re here, I’m going to go through it and add a little bit to what Matt included in Pages.
The basic html to include an image in any html document looks like this:
<img src=”/path-to-image/your-image.jpg”>
Pretty simple, right? Just place that code in the Page Copy (md) text block where you want it to appear. This assumes that the photo you want to include is in your filmstrip and is exported with the page. If you want to use an image that is not in the photos/ folder, include the entire url to the image file.
This code will place the image by itself at its full size as exported. But we want more control than that.
First, let’s control the size. Your image may have been exported at 1000px wide but maybe you only want it to be 300px wide on the page. That’s easy, just add the width attribute:
<img src=”path-to-image/your-image.jpg” width=”300″>
In the plug-ins, Matt has created some css classes to help with a number of things. For including images in the block, he’s created float-left, float-right, and inline-image. Float-left and float-right will place the image to the left or right, respectively, and text will flow around it. Matt’s also included some margin in the class rules so that the text doesn’t but up against the image. The inline-image class simply places an image inline with the text. It has no margin or padding.
(note: these classes have changed in CE4 see updated notes below)
So to float an image left, let’s add the float-left class:
<img src=”path-to-image/your-image.jpg” width=”300″ class=”float-left“>
UPDATE FOR CE4: <img src=”path-to-image/your-image.jpg” width=”300″ class=”alignleft“>
Now the image will be placed on the left side of the page and text will flow around it.
And to make things semantically correct in the html, you really should add some alt text for screen readers:
<img src=”path-to-image/your-image.jpg” width=”300″class=”float-left” alt=”some descriptive text”>
UPDATE FOR CE4: <img src=”path-to-image/your-image.jpg” width=”300″class=”alignleft” alt=”some descriptive text”>
If you want your viewers to be able to hover over the image and see some information about it, add the title attribute:
<img src=”path-to-image/your-image.jpg” width=”300″ class=”float-left” alt=”some descriptive text” title=”More descriptive text”>
UPDATE FOR CE4: <img src=”path-to-image/your-image.jpg” width=”300″class=”alignleft” alt=”some descriptive text”>
Need more styling or do you need to override the Image Border and Image Frame settings you’ve set in Lightroom? You can add some inline styling. This does require some css knowledge:
<img src=”path-to-image/your-image.jpg” width=”300″ class=”float-left” alt=”some descriptive text” title=”More descriptive text” style=“border: 2px red solid; padding: 0px;”>
UPDATE FOR CE4: <img src=”path-to-image/your-image.jpg” width=”300″ class=”alignleft” alt=”some descriptive text” title=”More descriptive text” style=“border: 2px red solid; padding: 0px;”>
This styling will place a 2px wide red border directly around the image and eliminate any padding (Image Frame in the TTG plug-in).
Matt’s float-left and float-right classes add 24px to the bottom and either the left or right side (margin-right is added to left-floated images and vise versa) but they don’t add any margin to the top. Depending on where you’ve inserted the image on the page (in the middle of a long paragraph, for instance), it’s very possible that you’ll end up with text running across the top of the image. In that case, add some margin-top to the style:
<img src=”path-to-image/your-image.jpg” width=”300″ class=”float-left” alt=”some descriptive text” title=”More descriptive text” style=”border: 2px red solid; padding: 0px; margin-top: 8px;“>
UPDATE FOR ce4: <img src=”path-to-image/your-image.jpg” width=”300″ class=”alignleft” alt=”some descriptive text” title=”More descriptive text” style=”border: 2px red solid; padding: 0px; margin-top: 8px;“>
If you prefer different width margins, you can remove the class all together and use “float:left;” and your own margin settings in the style attribute.
Place the code wherever you want the image to appear. Be aware that if you place images relatively close to one another you may see some floating weirdness.
Advanced
Do you want your viewers to be able to click on an image and be taken to another page? Then just wrap the entire img tag in an html anchor element:
<a href=”http://www.another-site.com”><img src=”path-to-image/your-image.jpg” width=”300″ class=”float-left” alt=”some descriptive text” title=”More descriptive text” style=”border: 2px red solid; padding: 0px; margin-top: 8px;”></a>
UPDATE FOR CE4: <a href=”http://www.another-site.com”><img src=”path-to-image/your-image.jpg” width=”300″ class=”alignleft” alt=”some descriptive text” title=”More descriptive text” style=”border: 2px red solid; padding: 0px; margin-top: 8px;”></a>
Lightroom quirks
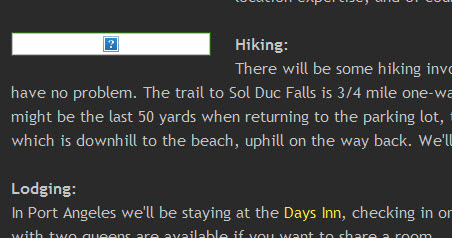
Hypothetically, if you’re including images that are in the filmstrip, you should see them appearing in the text in the Lightroom Preview area. On my Windows machine this is sometimes true, sometimes not. Often you’ll see a placeholder with a question mark in it. (Do make sure that you’ve chosen Use All Filmstrip Images in the Lightroom Toolbar)
In the filmstrip, if you select one of the images you’re including and reload the preview, that particular image will appear in the text. Usually, if the first image in the filmstrip is one of the images being used, that will also appear. I’ve found no rhyme or reason to it. I don’t think this problem crops up with Macs.


Rod thanks for the tips and tricks they’re awesome. I’m having trouble making this work for me in backlight. see this page http://weddings.hookephoto.com/about/ It looks like i’m writing the script correctly I must be missing something any ideas?
thank you
thom
the problem is the first quotation mark. The one before photos. It’s slanted/curly rather than straight. Not sure how that snuck in there.
Put the code in a plain text editor and replace that slanted quote mark with a straight one.
Once again Your the best!!
thanks so much
T