(this is an updated version of my original tutorial way back in the CE3 days)
In all Backlight Copy areas, (in pages, albums, album sets, and album and album set templates) you can add images to the text by using html. If you know some html this is easy. If you don’t, you’re probably starting to sweat right now. But it’s not that difficult and I’ll walk you through the basics.
The basic html to include an image in any html document looks like this:
<img src="/path-to-image/your-image.jpg" alt="descriptive text">
Pretty simple, right? Just place that code in the Copy (md) text block where you want it to appear.
Let’s look at that more closely. The <img> tag tells the browser that this is an image. src= tells the browser where to look for the image. the alt attribute adds information in the event that the image can’t be displayed for some reason or if the viewer is using a screen reader.
My suggestion for adding inline images to pages is to create a folder on the server and upload the images you want to use to that folder. You could use the Backlight image uploader (Designer > Templates > Upload Images) but I discourage that. The uploader is intended for things like logos, background images, favicons, etc. It will change the filename and strip the image of metadata.
My workflow is to export the images from Lightroom and then upload them via FTP to a folder in my site that I named “img.” The best place to create that folder is inside of your /backlight/custom/ folder.
With that in mind, my code would look like this:
<img src="/backlight/custom/img/my-image.jpg" alt="descriptive text">
This code assumes that the backlight/ folder is in the root of your site or subdomain. If it’s in a sub-folder, then adjust the path accordingly.
Now we can really get going.
First, let’s control the size. Your image may have been exported at 1000px wide but maybe you only want it to be 300px wide on the page. That’s easy, just add the width attribute:
<img src="path-to-image/your-image.jpg" width="300" alt="descriptive text">
Floating images
Matt has included css classes that will float images right, left, or center and adds margin that places a bit of space between the image and surrounding text. These class names are the same as those used in WordPress so if you have a blog and are using the Backlight WordPress theme, you can use the same classes.
This will float the image to the left with text wrapping to the right of the image.
<img src="path-to-image/your-image.jpg" width="300" class="alignleft" alt="descriptive text">
The other classes are “alignright”, “aligncenter”, and “alignnone”.
Title and styling
If you want your viewers to be able to hover over the image and see some information about it, add the title attribute:
<img src="path-to-image/your-image.jpg" width="300" class="alignleft" title="some descriptive text" alt="descriptive text">
Want to add some styling, like a border?
<img src="path-to-image/your-image.jpg" width="300" class="alignleft" style="border: 2px red solid;" title="some descriptive text" alt="descriptive text" >
This styling will place a 2px wide red border directly around the image.
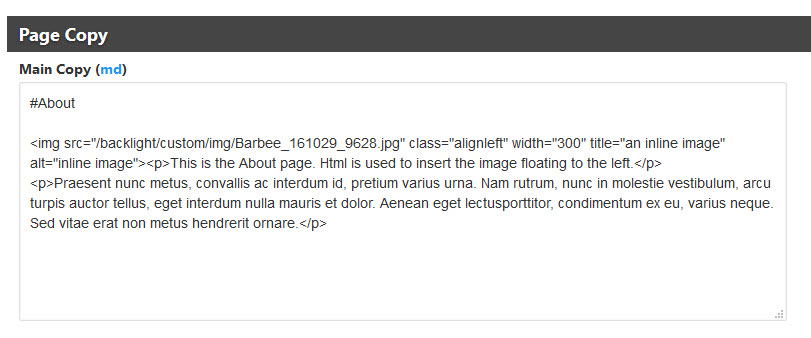
Include your text
The text and image code for the entire page would look something like this:
Add a link
Do you want your viewers to be able to click on an image and be taken to another page? Then just wrap the entire <img> tag in an html anchor element:
<a href="http://www.another-site.com"><img src="path-to-image/your-image.jpg" width="300" class="alignleft" alt="some descriptive text" title="More descriptive text" style="border: 2px red solid;"></a>
More styling and adding classes
There’s even more you can do if you wish, like adding drop shadows. You can do this either by adding the code inline with the image, create a custom css class and applying it on an as needed basis, or applying it to all inline images automatically via custom css.
Clearing the float
You’ll eventually come across a situation where you want the text to stop floating around an image. The answer is the “clear” property. Just add the clear property as inline styling at the start of the text you wish to clear from the float. If you were floating the image to the left, use clear:left;. If floating to the right, use clear:right;. If you’ve mixed things up a bit with pictures floating both left and right, then use clear: both;.
If it’s a paragraph, then add the clear to the p tag that starts the paragraph:
<p style="clear:left;">Your witty prose....</p>
If it’s a heading, add the clear to the heading element:
<h2 style="clear:left;">Your eye catching heading</h2>


Thanks Rod – wish you would have posted this a few years ago. It would have saved me from learning enough html to do it on my own for styling some of my web pages, but it is a very effective way to improve the page style. I use it on a few of my web pages and it really is quite simple once you get the hang of it.
I did! About 4 years ago I wrote a very similar post for the CE3 versions.
http://ttg-tips-and-tricks.barbeephoto.com/including-inline-images-block-text/
I started with LR1 and never thought to look back at the CE3 for ideas – but the experience was a good brain exercise for me. Actually took me back over 40 years to a time I taught myself to program in Basic and Fortran – computer languages have come a long way since then. 🤓