Using the phplugins feature of the TTG web products allows you to customize your site beyond what the web engines can already do, and managing navigation with phplugins is probably the most popular usage. So popular, in fact, that Matt has already coded the phplugins.php file for use in navigation.
You’ll first need to have phplugins enabled site wide.
Decide on the navigation you want to use: single level or multi-level. This needs to be set in the Lightroom plug-ins, so don’t forget to do that.
Next, open the phplugins.php file with your plain text editor (two good free editors are Notepad++ for Windows and Textwrangler for Mac)
Here’s a hopefully helpful hint. Create a folder on your computer named something like “phplugins and custom css” and place your phplugins/ folder inside this folder. You’ll notice that the phplugins/ folder contains a folder named “custom-css”. Make all of your phplugins and custom css changes using the files in this new folder. This keeps your customization files separate from any exports and makes them easier to find when you need to make more changes.
Back to editing the file. Scroll down the file until you come to the sections on navigation. Choose the kind of navigation you plan on using:
- SITE-WIDE “TRADITIONAL” NAVIGATION MENU
- SITE-WIDE “DROP-DOWN” NAVIGATION MENU
- SITE-WIDE “DROP-DOWN” NAVIGATION MENU w/ AUTO INDEX DROP-MENU
Notice these lines preceding and following each of the navigation function areas:


As you might have guessed, you’ll need to delete those lines to activate the function for the navigation type you’re using.
Once you know which navigation you plan on using, it’s time to customize the menu to your needs.
Let’s do something simple. Let’s use the “Traditional” navigation menu and delete a couple of items, move an item, and add a totally new navigation item.
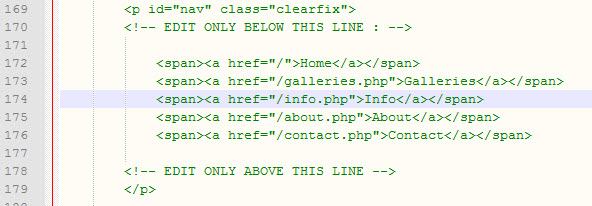
Let’s say that you only want to use the Home, Galleries, About, Contact, and Info menu items.
Locate the part of the code that contains the menu. It’s right below the line that states:
<!– EDIT ONLY BELOW THIS LINE : –>
Here’s the code that’s there by default:
 That code will give you the navigation menu that is, by default, laid out in the TTG plug-ins. But we want to change that.
For our purposes, we don’t need the Blog or Services menu items. So let’s just delete those lines.
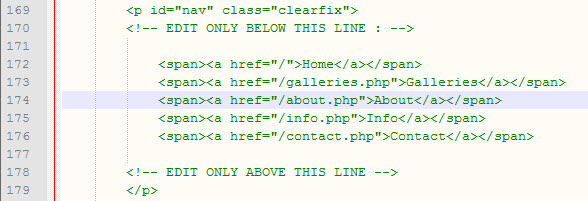
 And we want the About menu item to come before the Info item. So just highlight one of those lines and cut and paste it to its new location:
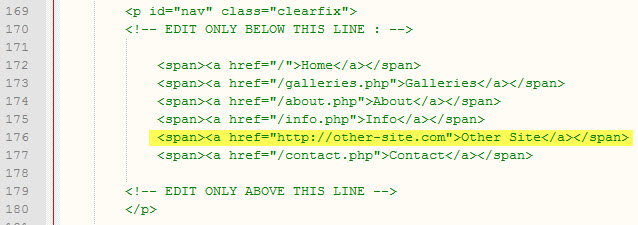
And now let’s add a menu item that links to an external site. And we’ll put it before the Contact menu item. The easiest way to do this is to copy and paste one line and then modify it to our needs:
Since you’ve enabled phplugins site wide, once you make these changes and upload the new phplugins.php file to your /phplugins/ folder, the change will take place instantly on all of your pages.
If you ever need to add another navigation menu item, simply come back to this file, copy a line of the existing code and place it where you want the new item to appear. Then just change URL and label to correspond with the new item.
For the other navigation types, just use this same technique to customize those menus. Simple!

