Here’s how to set up a WordPress based site using Backlight to create the WordPress theme and manage your galleries.
Assumption: The site is based on WordPress and you’re using Backlight for galleries and the site design.
WordPress
Install WordPress in the root of your site.
After the installation completes, log in and go to Settings.
- General: If your host has you set up with SSL, be sure the URL to your site starts with https://
- Permalink: set to Post name
- Set Time Zone
Install any plugins you wish to use, like a contact form plug-in.
DO NOT create a WordPress menu for the main menu. The menu set you create in Backlight will become your site menu.
Backlight
From your unzipped Backlight-Installer-xxx folder, upload the backlight/ and galleries/ folder. DO NOT upload the index.php and the .htaccess files. Those are only used for a Backlight based site.
Install Backlight by visiting yoursite.com/backlight/installer. See the Backlight documentation.
Install the Backlight WP Theme add-on along with any other add-ons you’ve purchased.
After installation, go through the Backlight Settings.
Set the Company Url and Site URL. If your host provides an SSL certificate, be sure to use https:// in the url.
Under Publisher, if you’re using Lightroom Publisher to manage and publish your albums, set the API key.
If using https, under Privacy set Automatically Redirect Browsers to https to yes.
Under JSON API, if you think you might want to insert a Backlight album into a WordPress blog or page using the
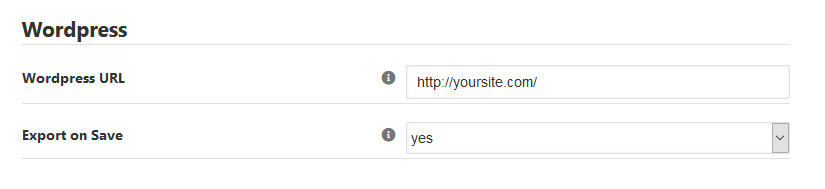
Under WordPress (still in Backlight Settings), set WordPress URL to your site URL. Use either the full url to your site or simply /. Either will work. Set Export on Save to yes.

Backlight templates
Backlight comes with three default templates: Default page template, default album set template and default album template. (Designer > Templates > List Templates)
The look of the site is set by the page template. The album set and album templates use the page template for their overall look. The look and functionality of thumbnail grids and image presentation are controlled by the album set and album templates. For a more thorough overview of templates and how they work, see the Backlight documentation.
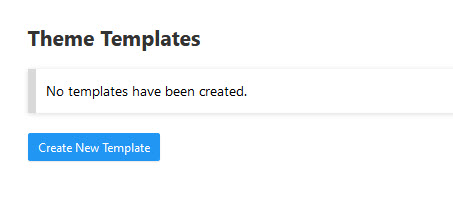
For now, create a new WordPress template by clicking on the New Template button under Theme Templates. The default page template will be used in the theme.
Save the template and export the theme to WordPress. See the Backlight documentation for more on creating a template and exporting the theme.
WordPress
In WordPress Admin go to Appearance > Themes and activate your new theme.
Now view your actual home page in another browser tab. You should see a blog page using the default Backlight theme layout.
Note that the default layout is a one column layout, so you won’t initially see a sidebar.
Assuming you want a Home page with the Blog page separate, do the following:
- From the WordPress dashboard go to Pages > New Page.
- Name your new page Home and Publish it.
- Create another page named Blog and Publish it.
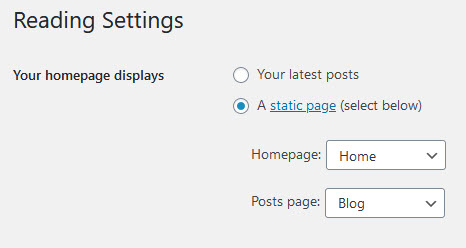
- Go to Settings > Reading.
- In Your homepage displays area, set the radio button to A static page.
- Below that, use the drop downs to set the Homepage and Posts page.
Go back to your site and refresh the home page. You should see a home page without much text. Just a header, navigation and a footer. Edit the home page (in WordPress) to add content.
The navigation menu items (other than Search) won’t really take you anywhere yet because none of the pages have been created.
Backlight
From the Backlight Dashboard go to the Designer menu and from the drop-down, choose Menu Sets. Click Design for the Default set.
Creating and editing Menu items is pretty easy. See the Backlight docs if you need help.
For now, add a Home menu item. Go to the bottom of the menu area and click Add. In the Link To section, choose URL and in the field either enter the full url to your site or simply enter /.
The Home item will be added to the end of the menu. Just drag and drop it at the top to put it first in the menu.
Add a Blog menu item. In the Link To section choose URL and add the url to the blog page: /blog.
(if you named your blog page anything other than “blog,” enter that name instead)
You can leave or remove the other menu items. Assuming you want Contact and About pages, you can just leave those and create the pages in WordPress. (Name those pages Contact and About.)
Create more pages in WordPress as needed. You can add them to the menu as either top level menu items or as sub-menu items.
Post and Page options
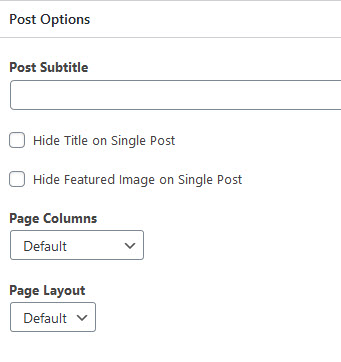 When creating pages and posts in WordPress, below the content editing area you’ll see Post Options. Here, among other things, you can set the number of page columns (1,2 or 3) and the layout.
In this example, the default Backlight layout is one column (because the page template used for the theme is one column). You may or may not want to use a one column layout for your albums. But for the WordPress side of your site, you might want to have a sidebar to hold various widgets. Or you might want to have your pages be one column and your posts to have sidebars.
If you decide that you want to use sidebars on WordPress pages and/or WordPress posts, but you don’t want to have to set the page columns and layout every single time,you add a page/post, you can create a two (or three) column layout page template in Backlight and use that template to create your WordPress theme. The layout of that template will become the default layout in the theme. You will still be able to create one column pages or posts in WordPress from the Post Options drop-downs.
If you want to create a separate template for WordPress, keeping the overall look you’ve designed for your albums (masthead, colors, menu, etc.), you can clone your default template into a new template. Then change the layout in the newly cloned template and assign that template to the WordPress theme. Or you can create a new WordPress theme with the new template, and then export and activate it.
To clone a template, from the Backlight Templates page click on the template name of the page template. That will open a View Template page. Click on the Clone tab.
Galleries
Create an album. How you do this will depend on how you want to manage your albums and album sets: either publishing from Lightroom or uploading using the Backlight Publisher. See the Backlight documentation for how to do this.
Once you have created an album, it will appear on both the Galleries page as well as in the Galleries menu.
But for the albums to appear in the Galleries menu, you need to set that up in the menu set. Go back to Backlight > Designer > Menu Sets and click Design on your menu set. Scroll down to the Galleries item. In the Link To drop-down, choose Album Set. The only album set you currently have is the Galleries album set (it was created automatically when you published the album).
In the adjacent drop-down menu, set the number of descendant levels. This depends on how you will organize your album. For now, you can set it to Descend up to 1 level. You can always change this later if you create multi-levels.
Design
Now’s the time you can start playing with your site design. If you’ve enabled the Export on Save option in the WordPress section of the Backlight Settings, every time you save your page template settings they are automatically sent to WordPress. All you need to do is refresh a page on the site to see the changes.
For designing, you can either change the default templates or create new ones.
The design of the Galleries page is controlled by the album set template that is assigned to that page. If you’ve created other album set templates and need to change the Galleries page template, do the following:
- In the Backlight menu, go to Publisher.
- Click on the name of your top-level gallery (unless you’ve changed it, it’s Galleries).
- Click on Edit Top-level Gallery.
- Click on Base Settings.
- Use the drop-down under Template to change the album set template.
Some Other Backlight Settings
In Backlight Settings under Personalisation you’ll see “Client Template.” If you plan on using the Client Response add-on, be sure to set this to match the page template used in the site.
Under Publisher you’ll see Search Template. If you create a new album template, be sure to change the template used for search.
If using the Cart add-on, under Cart Settings > Personalisation, set the Cart Template.
Good to Know
If using WordPress as the basis of the site you will need to create stand-alone pages in WordPress rather than Backlight.
Using the Backlight Theater and Galleria add-ons, you can create many more album types than just the standard Backlight album consisting of a thumbnail grid of images, each image linking to a larger version. Galleria creates slideshow albums. Theater can create slideshow albums, side-by-side image comparison albums, filmstrip albums, panorama albums and video embed pages.
As mentioned above, you can embed a Backlight thumbnail grid album into a WordPress page or post using the
If you need a slideshow in a WordPress page or post, look to one of the third party plug-ins, like NextGEN.
So there you have it; the basics (plus a little) of creating a WordPress site using Backlight.

